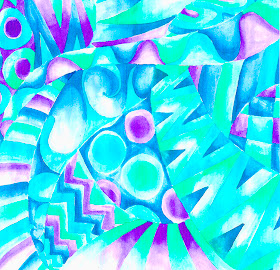
SUNDAY DOODLE PARTY: “LLIURE”


Avui reprenem i iniciem, alhora, la secció del Sunday Doodle amb la novetat de la participació dels Crafty Bloggers.
Com que és el primer diumenge, el tema és lliure i nosaltres ens hem deixat emportar i hem jugat amb els colors de l’estiu, les onades del mar, el cel i la natura.
I la festa continua. A continuació teniu els enllaços amb les obres dels Crafty Bloggers perquè pugueu gaudir de la seva inspiració i la creativitat.

FESTA D’ENLLAÇOS, FESTA D’ARTISTES!!!


SUNDAY DOODLE PARTY: “LIBRE”.

Hoy retomamos e iniciamos a la vez la sección del Sunday Doodle con la novedad de la participación de l@s Crafty Bloggers.
Como es el primer domingo, el tema es libre i nosotr@s nos hemos dejado llevar y hemos jugado con los colores del verano, las olas del mar, el cielo y la naturaleza.
Y la fiesta continúa. A continuación tenéis los enlaces con las obras de l@s Crafty Bloggers para que podáis gozar de su inspiración y creatividad.

¡¡¡FIESTA DE ENLACES, FIESTA DE ARTISTAS!!!


SUNDAY DOODLE PARTY: "FREE"

Today we return and start, at the same time, the section of the Sunday Doodle with the novelty of the participation of the Crafty Bloggers.
Because it is the first Sunday, the theme is free and we have left and we played with the colours of the summer, the waves of the sea, the sky and nature.
And the party continues. Here are links to the works of the Crafty Bloggers so you can enjoy their inspiration and creativity.

PARTY LINKS, ARTISTS PARTY ON!!!


 photo Subscripcioacutesobres_zps9cf2e0ca.jpg

REPTE PINTEREST D’AGOST: ESTORETA PEL RATOLÍ.


Ja ha arribat el final d’agost i amb ell el repte pinterest del blog “Scarlata y el SeñorDon Gato”. I no podíem faltar a la cita.
La proposta d’aquest mes era una estoreta pel ratolí i nosaltres, aprofitant el canvi de look, ens hem fet una a la mida: La nostra capçalera, la nostra imatge i el nostre nom; tot nostre.
Potser hem pecat d’egocèntriques, però ens feia gràcia saber com quedaria; i ens agrada el resultat.
Esperem que la idea de fer una estoreta amb la vostra imatge de blog no us sembli tan esbojarrada i us hagi inspirat.

IMATGE CORPORATIVA PER UN REPTE MOLT INSPIRADOR!!!


RETO PINTEREST DE AGOSTO: ALFOMBRILLA PARA RATÓN.

Ya ha llegado el final de agosto y con él el reto pinterest del blog “Scarlata y el Señor Don Gato”. Y no podíamos faltar a la cita.
La propuesta de este mes era una alfombrilla para ratón y nosotras, aprovechando el cambio de look, nos hemos hecho una a la medida: Nuestra cabecera, nuestra imagen y nuestro nombre; todo nuestro.
Tal vez hemos pecado de egocéntricas, pero nos hacía gracia saber como quedaría; y nos gusta el resultado.
Esperamos que la idea de hacer una alfombrilla con vuestra imagen de blog no os parezca tan descabellada y os haya inspirado.


¡¡¡IMAGEN CORPORATIVA PARA UN RETO MUY INSPIRADOR!!!


AUGUST PINTEREST CHALLENGE: MOUSE PAD.

It has already reached the end of august and with it the Pinterest Challenge of “Scarlata y el Señor Don Gato”blog. And we could not miss the appointment.
The proposal of this month was a mouse pad and we, taking advantage of the change of look, have made us a custom: our heading, our image and our name; all our.
Perhaps we have sinned of egocentric, but it made us grace to know how it would be; we like the result.
We hope that the idea of doing a mouse pad with your blog image not appears as far-fetched and you have inspired.


CORPORATE IDENTITY FOR A CHALLENGE VERY INSPIRING!!!


 photo Subscripcioacutesobres_zps9cf2e0ca.jpg

CRAFTY BLOGGERS SUNDAY DOODLE.


Com ja sabeu, Les Antònies tenim el costum de fer un doodle o una il·lustració cada diumenge i volem fer-vos una proposta: Què us semblaria que els Crafty Bloggers també participessin en aquesta iniciativa?
Hem pensat que seria molt bona idea, ja que la majoria de vosaltres, d’una manera o d’altre, teniu experiència amb el dibuix i també serviria per cohesionar més el grup.
La nostra proposta és que cada diumenge, qui vulgui participar fes un doodle o una il·lustració amb la tècnica que millor li sembli, penjar-lo al blog de Les Antònies i també al Grup dels Crafty Bloggers. Creiem que seria una manera divertida i creativa de donar-nos a conèixer encara més per la blogesfera.
Si us animeu, aquest diumenge serà el primer d’aquest esdeveniment i us donem les indicacions per participar-hi. Per ser la primera vegada el tema és lliure; podeu expressar allò que vulgueu amb la tècnica que vulgueu. Més endavant podem proposar algun tema o tècnica per donar una mica més d’emoció; evidentment qualsevol membre dels Crafty Bloggers pot proposar tot allò que l’inspiri.
Per enllaçar la vostra obra ho heu de fer a l'entrada del diumenge.
Esperem que us agradi aquest festival de creativitat.


DOODLES, GARGOTS O GARABATOS: NOMÉS COMPTA LA IMAGINACIÓ!!!

CRAFTY BLOGGERS SUNDAY DOODLE.

Como ya sabéis, Les Antònies tenemos la costumbre de hacer un doodle o una ilustración cada domingo y queremos hacer una propuesta: ¿Qué os parecería que l@s Crafty Bloggers también participasen en esta iniciativa?
Hemos pensado que sería muy buena idea, ya que la mayoría de vosotr@s, de una manera o de otra, tenéis experiencia con el dibujo y también serviría para cohesionar más el grupo.
Nuestra propuesta es que cada domingo, quien quiera participar hiciera un doodle o una ilustración con la técnica que mejor le  parezca, colgarlo en el blog de Les Antònies y también en el Grupo de l@s Crafty Bloggers. Creemos que sería una manera divertida y creativa de darnos a conocer mucho más por la blogosfera.
Si os animáis, este domingo será el primero de este evento y os damos las indicaciones para participar. Por ser la primera vez el tema es libre; podéis expresar lo que queráis con la técnica que queráis. Más adelante podemos proponeros algún tema o técnica para dar un poco más de emoción; evidentemente cualquier miembro de l@s Crafty Bloggers puede proponer todo aquello que le inspire.
Para enlazar vuestra obra lo tenéis que hacer  en la entrada del domingo
Esperamos que os guste este festival de creatividad.


¡¡¡DOODLES, GARGOTS O GARABATOS: SOLO CUENTA LA IMAGINACIÓN!!!

CRAFTY BLOGGERS SUNDAY DOODLE.

As you know, Les Antònies have the habit of making a doodle or an illustration each sunday and we want to make a proposal: would seem that the Crafty Bloggers to also participate in this initiative?
We thought it would be very good idea, since most of you, in one way or another, have experience with the drawing and also served to unite over the group.
Our proposal is that each sunday, who wants to participate make a doodle or an illustration with the technique that fit, hang it on the blog of Les Antònies blog and also in the Group of Crafty Bloggers. We believe it would be a fun and creative way for us to be known much more by the blogosphere.
If you decide, this sunday will be the first of this event and we give you the instructions to participate. For being the first time the theme is free; you can express whatever you want using the technique that you want. Later we can propose any topic or technique to give a little more excitement; of course any member of Crafty Bloggers can propose anything that inspires you.
To link your work you must do it on sunday's blog post
We hope you enjoy this festival of creativity.


DOODLES, GARGOTS OR GARABATOS: HAS ONLY THE IMAGINATION!!!


 photo Subscripcioacutesobres_zps9cf2e0ca.jpg

ROSES DE GANXET: TUTORIAL


Ens agraden les flors i l’hem agafat el gust a fer-les de ganxet. Després de passejar-nos per Pinterest vàrem descobrir les que ara us mostrarem.
Aquestes roses són el nostre experiment i creiem que ens han quedat prou bé.
Les hem fet en tres mides diferents: Gran, mitjana i petita, i cada una amb un patró diferent, però podeu adaptar el què més us agradi a la mida que vulgueu; depèn de les cadenetes que feu.
Hem fet els esquemes i ara us farem unes quantes especificacions de cada una per a que pugueu treballar millor.
Començarem amb la rosa gran (Esquema nº 1): S’han de fer 71 punts de cadeneta. La primera volta s’inicia punxant el ganxet a la 5ª cadeneta i es fan dos punts alts separats per dues cadenetes en el mateix punt; deixem dues cadenetes entre grups i ho fem fins a acabar tota la tira. La segona volta comença amb tres cadenetes+1p.alt+2cad+2p.alts treballats damunt les dues cadenetes inferiors; heu de seguir l’esquema i acabar tota la volta. Cada grup es forma amb 2 p.alt+2cad+2p.alt. La tercera volta comença amb un punt lliscant i es treballen 7 p.alt sobre les cadenetes inferiors. Amb aquesta volta s’acaba el treball i només hem de roscar la tira formant la flor; cosim pel fons, unint totes les capes i ja tenim la nostra rosa.
L’esquema nº 2 és el de la rosa més petita: Es fan 24 punts de cadeneta i es fa un p.baix sobre cada cadeneta. La següent volta es comença amb un punt lliscant i es munten 3 p. alts a cada p. baix; es separen amb un punt lliscant: p.llis+3 p.alt+p.llis. Amb la tira acabada fem el mateix que amb la rosa gran.
La rosa mitjana és creació nostra i la fem seguint l’esquema 3: Fem 24 p. de cadeneta i sobre cada cadeneta fem un punt baix. La següent volta s’inicia amb 3 cadenetes i damunt de cada p.baix fem un p.alt. L'última volta comença amb un p. lliscant i teixim 5 p.alts sobre cada p.alt. Així fins a acabar la volta i ja podem muntar la rosa com les dues anteriors.
Ja veieu, són molt fàcils, ràpides i queden molt bé per fer fermalls o per aplicar-les damunt d’un jersei, d’una bossa o allà on necessiteu un toc floral.


UN JARDÍ DE LLANA PER L’HIVERN O L’ESTIU!!!


ROSAS DE GANCHILLO: TUTORIAL

Nos gustan las flores y le hemos cogido gusto a hacerlas de ganchillo. Después de pasearnos por Pinterest descubrimos las que ahora os  mostraremos.
Estas rosas son nuestro experimento y creemos que nos han quedado muy bien.
Las hemos hecho en tres tamaños diferentes: Grande, mediana y pequeña; y cada una con un patrón diferente, pero podéis adaptar el qué más os guste a la medida que queráis; depende de las cadenetas que hagáis.
Hemos hecho los esquemas y ahora os daremos unas cuantas especificaciones de cada una para que podáis trabajar mejor.
Empezaremos con la rosa grande (Esquema nº 1): Se tienen que hacer 71 puntos de cadeneta. La primera vuelta se inicia pinchando el ganchillo en la 5ª cadeneta y se hacen dos puntos altos separados por dos cadenetas en el mismo punto; dejamos dos cadenetas entre grupos y lo repetimos hasta acabar toda la tira. La segunda vuelta empieza con tres cadenetas+1p.alt+2cad+2p.alts trabajados sobre las dos cadenetas inferiores; tenéis que seguir el esquema y acabar toda la vuelta. Cada grupo se forma con 2 p.alt+2cad+2p.alt. La tercera vuelta empieza con un punto deslizante y se tejen 7 p.alt sobre las cadenetas inferiores. Con esta vuelta se acaba el trabajo y solo tenemos que enroscar la tira formando la flor; cosemos por el fondo, uniendo todas las capas y ya tenemos nuestra rosa.
El esquema nº 2 es el de la rosa más pequeña: Se hacen 24 puntos de cadeneta y se hace un p.bajo sobre cada cadeneta. La siguiente vuelta se empieza con un punto deslizante y se montan 3 p. altos en cada p. bajo; se separan con un p. deslizante: p.des+3 p.alt+p.des. Con la tira acabada hacemos lo mismo que con la rosa grande.
La rosa mediana es creación nuestra y la haremos siguiendo el esquema nº 3: Hacemos 24 p. de cadeneta y sobre cada cadeneta hacemos un punto bajo. La siguiente vuelta se inicia con 3 cadenetas y sobre de cada p.bajo hacemos un p.alto. La última vuelta empieza con un p.deslizante y tejemos 5 p.altos sobre cada p.alto. Así hasta acabar la vuelta y ya podemos montar la rosa como las dos anteriores.
Ya veis, son muy fáciles, rápidas y quedan muy bien para hacer broches o para aplicarlas en un jersey, un bolso o donde necesitéis un toque floral.


¡¡¡UN JARDIN DE LANA PARA EL INVIERNO O EL VERANO!!!


CROCHET ROSES: TUTORIAL

We like the flowers and we have taken the taste to do it to crochet. After walks to Pinterest, we discovered which will now show you.
These roses are our experiment and we believe that they have been well enough.
We have made them in three different sizes: large, medium and small; and each with a different pattern, but can adapt to that you like to the extent you want; it depends on the chains that you do.
We've done the schemes and now we are going to do a few specifications of each one so that you can work better.
We'll start with the large Rose (Diagram No. 1): you have to make a chain of 71 points. The first round starts hurting crochet in the 5th chain and two double treble crochet points are separated by two chain points in the same point; leave two also between groups and do it to finish the whole strip. The second round begins with three ch+ 1 dtcp + 2ch + 2 dtcp worked on the two lower chains; you should follow the outline and finish all around. Each group is formed with 2 dtcp + 2ch + 2 dtcp. The third round starts with a slider point and work 7 dtcp on the bottom also. With this round is just work and we just had to thread the strap into the flower; sew along the bottom, joining all layers and we already have our Rose.
Diagram no. 2 is the smaller Rose: are made 24 points of chain and becomes a treble crochet point on each chain. The next round will start with a slider point and mounted 3 double treble crochet point in each tcp below; are separated with a sliding point: sp + 3 dtcp + sp. With the finished strip we do the same thing like the larger Rose.
The medium rose is our creation and we will do it according to the scheme, no. 3: we do 24 chain points and on each point do a treble crochet point. The next round starts with 3 chains points; above each tcp make a dtcp. The last round starts with a slider point and we weaved 5 dtcp on each dtcp from above. So we finish the round and we can mount the rose as the previous two.
As you can see, they are very easy, fast and are very nice to do a brooch or to apply them on a sweater, a bag or wherever you need a floral touch. 


A GARDEN OF WOOL FOR THE WINTER OR SUMMER!!!


 photo Subscripcioacutesobres_zps9cf2e0ca.jpg

TUTORIAL DRAPET: CISTELLS


Ja trigàvem a fer alguna cosa en drapet i el nostre primer experiment són aquests dos cistells.
No són gaire grans perquè els cabdells que hem fet servir només són de 100gr (1), però han quedat ideals per fer servir al bany, al pentinador o per posar testos amb plantes.
El que més ens ha sorprès és com condeix la feina; en una horeta més o menys pots tenir un enllestit.
Ara us explicarem com els hem fet, encara que ja sabem que qui més qui menys ja n’ha fet uns quants.
Farem 5 cadenetes (2) i les unirem per començar la base rodona. En l’esquema (3) podeu veure com es fa un cercle pla: comencem amb 1 cad + 8 p. baixos i les següents voltes són de punt alt: s’han de fer dos punts alts a cada punt inferior. Amb 3 voltes vàrem tenir suficient per fer la base (4). Depenent de la mida i la quantitat de drapet que tingueu podeu fer més voltes; sempre heu de respectar la regla de doblar el punt a la volta superior.
Per fer el cos del cistell continuem teixint, però ja no doblem el punt (un punt en cada punt inferior) i ho fem tot amb punt baix. A mesura que aneu fent voltes veureu com es fa més profund (5). És la tècnica de l’amigurumi.
Nosaltres vàrem parar quan es va acabar la troca de drapet i, com no teníem prou per acabar una volta, ho vàrem rematar deixant aquest espai que li dóna un aire modern (6).
L’experiència ens ha agradat i hem repetit, però això ja us ho ensenyarem més endavant.


A QUI NO AGRADEN ELS CISTELLS DE DRAPET??? 


TUTORIAL TRAPILLO: CESTOS

Por fin nos decidimos a usar el trapillo y nuestro primer experimento son estos dos cestos.
No son muy grandes porqué los ovillos que hemos usado solo son de 100gr (1), pero han quedado ideales para usar en el baño, el tocador o para poner tiestos con plantas.
Lo que más nos ha sorprendido es  como cunde la labor; en una horita más o menos puedes tener uno acabado.
Ahora os explicaremos como los hemos hecho, aunque  ya sabemos que  algunos de vosotros ya habéis hecho unos cuantos.
Haremos 5 cadenetas (2) y las uniremos para empezar la base redonda. En el esquema (3) podéis ver como se hace un círculo plano: empezamos con 1cad + 8 p.bajos y las siguientes vueltas son de punto alto: se tienen que hacer dos puntos altos en cada punto inferior. Con 3 vueltas tuvimos suficiente para hacer la base (4). Dependiendo del tamaño y de la cantidad de trapillo que tengáis podéis hacer más vueltas; siempre se ha de respetar la regla de doblar el punto en vuelta superior.
Para hacer el cuerpo del cesto continuamos tejiendo, pero ya no doblamos el punto (un punto en cada punto inferior) y lo hacemos todo en  punto bajo. A medida que vais haciendo vueltas veréis como se hace más profundo (5). Es la técnica del amigurumi.
Nosotr@s paramos cuando se nos acabo el ovillo de trapillo y, como no teníamos suficiente para acabar la vuelta, lo rematamos dejando este hueco que le da un aire moderno (6).
La experiencia nos ha gustado y hemos repetido, pero ya os lo enseñaremos más adelante.


¿¿¿A QUIEN NO LE GUSTAN LOS CESTOS DE TRAPILLO???  


TUTORIAL T-SHIRT YARN: BASKETS

Finally we decided to use the t-shirt yarn and our first experiment are these two baskets.
They are not very large why the balls we use only are 100 gr. (1), but are ideal for use in the bathroom, dressing table or putting pots with plants.
What has most surprised us is how it spreads the work; in an hour you can more or less have one finished.
Now we will explain as we have done, even though we know that some of you already have made a few.
We will make 5 chains (2) and join them to begin the round base. In the schema (3) you can see how to make a flat circle: started with 1 chain + 8 treble crochet points and following returns are double treble crochet point: you have to do two double treble crochet points in each lower point. With 3 laps we had enough to make the base (4). Depending on the size and the amount of t-shirt yarn you have you can do more laps; it has always respected the rule of doubling the point in top spin.
To make the body of the basket continue weaving, but already not bend point (a point at each lower point), and we do everything in treble crochet point. As you go doing laps you'll see how to make deeper (5). It's the technique of the amigurumi.
We stop when it ended the t-shirt yarn ball and, as we didn't have enough to finish a lap, so we leave this space which then gives it a modern air (6).
We enjoyed the experience and we have repeated, but that we will show later.


WHO DOESN'T LIKE T-SHIRT YARN BASKETS???


 photo Subscripcioacutesobres_zps9cf2e0ca.jpg

LES ANTÒNIES “RELOADED”.


Malgrat el poc temps que fa què tenim blog ens hem decidit a canviar la imatge i donar-li un altre aire.Volíem que fos més fresc i clar, amb les fotos més nítides i amb detalls únics i personals.
Hem fet un dibuix en aquarel·la i a partir d’aquí hem creat la nova imatge. També hem fet petites il·lustracions i sanefes per completar tot el conjunt.
La part tècnica l’hem après seguint els tutorials de Mamá quiero ser bloggerEl perro de papel i Personalización de Blogs. Realment ens han sigut molt útils i instructius.
Esperem haver aconseguit la nostra fita i que us agradi tant com a nosaltres.


A L’ESTIU TOCA RENOVACIÓ!!!


LES ANTÒNIES “RELOADED”.

A pesar del poco tiempo que hace que tenemos blog nos hemos decidido a cambiar la imagen y darle otro aire.
Queríamos que fuese más fresco y claro, con las fotos más nítidas y con detalles únicos y personales.
Hemos hecho un dibujo en acuarela y a partir de aquí hemos creado la nueva imagen. También hemos hecho pequeñas ilustraciones y cenefas para completar todo el conjunto.
La parte técnica la hemos aprendido siguiendo los tutoriales de Mamá quiero ser blogger, El perro de papel Personalización de Blogs. Realmente nos han sido muy útiles e instructivos.
Esperamos haber conseguido nuestra meta y que os guste tanto como a nosotras.


¡¡¡EN VERANO TOCA RENOVACIÓN!!!


LES ANTONIES "RELOADED".

Despite the little time that we have blog, we have decided to change the image and give it another look.
We wanted to be more fresh and clear, with the sharpest photos and unique and personal details.
We have done a drawing in watercolour and from here we create the new image. We have also made small illustrations and borders to complete the whole.
The technical part we have learned it following the tutorials of Mamá quiero ser bloggerEl perro de papel and Personalización de Blogs. They have really been us very useful and instructive.
We hope to have achieved our goal and you enjoy it so much as to us.


SUMMER IT’S RENEWAL TIME!!!


 photo Subscripcioacutesobres_zps9cf2e0ca.jpg

TUTORIAL PATCHWORK: BOSSA TRICOLOR.


La mama de les Antònies també fa patchwork i l’última cosa que ha fet ha sigut una estiuenca bossa tricolor.
Ara us explicarem les passes per si voleu fer-vos una vosaltres. No us donarem les mesures exactes perquè, així, podreu fer-la de la mida que més us convingui.
Necessitem 6 retalls de la mateixa mida, d’uns 15cm d’ample i el llarg que creieu adient. Hem fet servir 3 teixits diferents i hem tallat 2 retalls de cada (1). Els hem unit de 3 en 3. Escollim el central i cosim primer el que anirà a la dreta (2) i després el de l’esquerra (3). Ho repetim amb els altres 3 retalls. Ja tenim les dues tapes de la bossa.
Anem pels laterals. Necessitem 2 retalls de la mateixa llargada que els anteriors, però de només 10cm d’ample (4). Cada un l’hem fet de diferent color. Podeu repetir teixit, o fer-ho amb altres de diferents. Els disposem com veieu (5). Unim el lateral de l’esquerra (6) i quan ja estan units a cada tapa, unim les tapes, però no tanquem la bossa (7).
El següent pas és embuatar. Ens cal un tros de buata i tela de coto llisa per fer de folre de la mateixa mida de la tira que tenim (8). Unim les tres capes (bossa, buata, folre) amb 4 costures tot al voltant. I fem l’encoixinat (9). Podeu seguir les tires o fer un dibuix lliure, depèn de la vostra habilitat. Ara ja si que podem unir els dos extrems per formar el cos de la bossa (10).
El fons de la bossa el farem amb un retall de la mateixa amplada dels laterals: 10cm i el llarg serà l’ample de la bossa. Nosaltres l’hem arrodonit, però es pot fer recte, és més senzill de cosir (11). Com va embuatat necessitem la mateixa mida de buata i folre (12) i unim les capes amb una costura  a tot el voltant (13). No cal encoixinar-ho. Ja podem cosir el fons a la bossa (14).
Evidentment no la deixarem així. Folrarem la bossa. La mama Antònia ho ha fet amb folre de seda, però creiem  que pot quedar molt bé amb una tela de cotó estampada, en contrast amb la resta de la bossa. Ha de tenir la mateixa mida de la bossa tant de llarg com d’ample. Si ho podeu fer en una peça,  perfecte, si no, ho uniu pel mig i cosiu les costures laterals (15). Introduïm el folre dins la bossa, amb les costures tocant la bossa i la part bonica fora (16).
Toca unir la bossa i el folre. Ho farem amb un biaix, que pot ser de tela de patchwork o dels que venen a les merceries en un color contrastat o coordinat amb la bossa (17). Primer es cus la part interior, unint les dues capes (18) i es remata per davant amb un punt ocult (19).
Ja estem acabant. Per fer les nanses tallem dues tires de roba de cotó; les mides depenen del llarg i ample que vulguem. Per fer les nanses més resistents, a l’interior posarem cinta com la de les corretges de les motxilles, de la mateixa mida que les nanses (20).
El procés és senzill: cosim la corretja de motxilla a la tira (21); pleguem la tela i, amb punt amagat, cosim tapant la corretja (22). Encarem i cosim a la bossa les nanses, per l’interior (23).
Ho rematem tot amb una bagueta i un botó de fusta per tancar la bossa (24).
Ja podem gaudir i lluir la nostra bossa d’estiu.


IDEAL PER LA PLATJA O PER SORTIR A PASSEJAR!!!


TUTORIAL PATCHWORK: BOLSO TRICOLOR.

La mamá de les Antònies también hace patchwork y la última cosa que ha hecho ha sido un veraniego bolso tricolor.
Ahora os explicaremos los pasos por si queréis haceros una vosotr@s. No os daremos las medidas exactas porqué, así, podréis hacerla del tamaño que más os convenga.
Necesitamos 6 retales de la misma medida, de unos 15cm de ancho y el largo que creáis conveniente. Hemos usado 3 telas diferentes y hemos cortado 2 retales de cada (1). Los hemos unido de 3 en 3. Escogemos el central y cosemos primero el que irá a la derecha (2) y después el de la izquierda (3). Lo repetimos con los otros 3 retales. Ya tenemos las dos tapas del bolso.
Vamos a por los laterales. Necesitamos 2 retales del mismo largo que los anteriores, pero de solo 10cm de ancho (4). Los hemos hecho de diferente color. Podéis repetir tela, o hacerlo con otras diferentes. Lo disponemos como  veis (5). Unimos el lateral de la izquierda (6) y cuando ya están unidos a cada tapa, unimos les tapas, pero no cerramos el bolso (7).
El siguiente paso es enguatar. Necesitamos un trozo de guata y tela de algodón lisa para hacer de forro de la misma medida de la tira que tenemos (8). Unimos las tres capas (bolso, guata, forro) con 4 costuras alrededor. Y lo acolchamos (9). Podéis seguir las tires o hacer un dibujo libre, depende de vuestra habilidad. Ahora ya sí que podemos unir los dos extremos para formar el cuerpo del bolso (10).
El fondo del bolso lo haremos con un retal del mismo ancho que los laterales: 10cm y de largo será la anchura del bolso. Nosotr@s hemos redondeado los extremos, pero se pueden dejar rectos, es más sencillo de coser (11). Como va enguatado necesitamos la misma medida de guata y forro (12); unimos las capas con una costura  alrededor (13). No hace falta acolcharlo. Ya podemos coser el fondo al bolso (14).
Evidentemente no lo dejaremos así. Forraremos el bolso. La mamá Antònia lo ha hecho con forro de seda, pero creemos que puede quedar muy bien con una tela de algodón estampada, en contraste con el resto del bolso. Ha de ser de la misma medida que el bolso,  tanto de largo como de ancho. Si lo podéis hacer de una pieza, perfecto, si no, lo unís por el medio y coséis las costuras laterales (15). Introducimos el forro dentro del bolso, con las costuras tocando el bolso y la parte bonita fuera (16).
Toca unir el bolso y el forro. Lo haremos con un bies, que puede ser de tela de patchwork o de los que venden en las mercerías en un color contrastado o coordinado con el bolso (17). Primero se cose la parte interior, uniendo las dos capas (18) y se remata por delante con un punto oculto (19).
Ya estamos acabando. Para hacer las asas cortamos dos tiras de tela de algodón; las medidas dependen del largo y ancho que queramos. Para hacer las asas más resistentes, en el interior pondremos cinta como la de las correas de las mochilas, de la misma medida que las asas (20).
El proceso es sencillo: cosemos la correa de mochila a la tira (21); plegamos la tela y, con punto escondido, cosemos tapando la correa (22). Encaramos y cosemos al bolso las asas, por el interior (23).
Lo rematamos todo con una presilla de cordón y un botón de madera para cerrar el bolso (24).
Ya podemos disfrutar y lucir nuestro bolso de verano.


¡¡¡IDEAL PARA LA PLAYA O PARA SALIR A PASEAR!!!


PATCHWORK TUTORIAL: TRICOLOR PURSE.

The Les Antònies’s mum also makes patchwork and the last thing she has done has been a summery tricolour purse.
Now we will explain the steps if you want to make yourself one. We don’t give you exact measures because, well, you can make it the size that suits you.
We need 6 scraps of the same size, about 15 cm wide and the length that you think appropriate. We used 3 different fabrics and we have cut 2 of each (1). We joined 3 on 3. Choose the central and sew first what will go on the right (2) and then the one on the left (3). You repeat with the other 3 cuts. We already have the two covers of the purse.
And now, the sides. We need 2 cuts of the same length than the previous ones, but only 10 cm in width (4). Each one we've done of different colour. You can repeat fabric, or do it with different others. We put them available as you can see (5). Join the side of the left (6) and when they are attached to each lid, join the covers, but do not close the bag (7).
The next step is padding. We need a piece of padding cotton and smooth cotton fabric for lining the same size of the strip that we has (8). Join the three layers (bag, padding cotton, and lining) with 4 stitching all around. And we do the padding (9). You can follow the strips or make a free drawing, depends on your ability. Now if we can unite the two ends to form the body of the bag (10).
We do the bottom of the bag with a trim of the same width of the sides: 10cm and long will be the width of the purse. We've rounded up, but can be done straight; it is easier to sew (11). How did padding we need the same size of padding cotton and lining (12) and join the layers with a stitching all around (13). We don’t need quilting it. We can sew the bottom to the purse (14).
Obviously we don’t leave it as well. We’re lining the purse. Mum Antònia has done it with silk lining, but we believe it can be nice with a patterned cotton fabric, in contrast with the rest of the purse.  It must have the same size of the purse as long as wide. If you can do this in a piece, it’s perfect, but, if you don't, you join it through the middle and sew the side seams (15). Introduce the lining inside the purse, with the seams by touching the purse and the right part outside (16).
It’s time to join bag and liner. We will do this with a bias, which can be patchwork fabric or those who sell in the haberdashery in a colour contrasted or coordinated with the purse (17). It is first sewn inside, joining the two layers (18) and topped in front with a blind point (19).
We are already running out. To make the handles cut two strips of cotton clothing; the sizes depend on the length and width that you want. To make the most resistant handles, inside put tape as the straps of backpacks, the same size as the handles (20).
The process is simple: sew the strap of a backpack in the strip (21); fold the fabric and, with hidden point, sew covering belt (22). Face and sew in the bag, the handles to the interior (23).
We finish off everything with a cord clamp and a wooden button to close the purse (24).
We can enjoy and show off our summer purse.


IDEAL FOR THE BEACH OR TO GO OUT FOR A WALK!!!


 photo Subscripcioacutesobres_zps9cf2e0ca.jpg

TUTORIAL PATCHWORK: DOS BLOCS I UNA MICA DE MÀGIA.


El tutorial d’avui és molt més fàcil i ràpid que l’anterior i a més podem tenir dos blocs diferents.
Les mides i quantitats les teniu al esquema. Com podeu veure treballem amb tires de 4 cm d’ampla encara que el llarg varia. Només utilitzem un quadrat de 12X12cm que ens serveix de peça central i base del nostre bloc inicial.
Comencem pel quadrat i les dues primeres tires de 4X12cm (1). Les col·loquem de manera que quedin una a la banda oposada de l’altra i les cosim (2). En els dos costats que ens queden sense emmarcar posem dues tires de 4X18cm (3). Han d’abraçar el quadrat i les dues tires anteriors, d’aquí que siguin 6 cm més llargues. Si voleu tenir més seguretat, podeu fer les tires una mica més llargues i una vegada cosides (4) retallar per on sobresurti. Continuem fent la mateixa operació amb les següents tires de 4X18cm (5); les cosim (6) i acabem amb les tires més llargues: 4X25cm (7); una vegada cosides (8) ja tenim el primer bloc acabat (9). (BLOC 1)
Podem quedar-nos amb aquest bloc que és molt bonic i fer treballs esplèndids, però, i ara ve la part de la màgia, podem transformar-lo i convertir-lo en un bloc amb una creu al centre.
Una vegada planxat, el tallem en 4 parts fent creu (10). Les separem (11) i les distribuïm com veieu en el esquema (12). Fixeu-vos en que ha de fer una creu del mateix color al mig. Cosim primer de dos en dos (13) i acabem cosint els dos grups (14). Ja tenim el BLOC 2.
Podeu combinar els dos blocs o només treballar amb un tipus cada vegada. És igual com ho feu ja que el resultat serà genial.


D’UN A DOS AMB UN PARELL DE TALLS!!!


TUTORIAL PATCHWORK: DOS BLOQUES Y UN POCO DE MAGIA.

El tutorial de hoy es mucho más fácil y rápido que el anterior y  además podemos tener dos bloques diferentes.
Las medidas y cantidades las tenéis en el esquema. Como podéis ver trabajamos con tiras de 4cm de ancho aunque el largo varía. Solo utilizamos un cuadrado de 12X12cm que nos sirve de pieza central y base de nuestro bloque inicial.
Empezamos con el cuadrado y las dos primeras tiras de 4X12cm (1). Las colocamos de manera que queden una en el lado opuesto de la otra y las cosemos (2). En los dos lados que nos quedan sin  enmarcar ponemos dos tiras de 4X18cm (3). Han de abrazar el cuadrado y las dos tiras anteriores, por esto son 6cm más largas. Si queréis tener más seguridad, podéis hacer las tiras una poco más largas y una vez cosidas (4) recortar lo que sobre. Continuamos realizando la misma operación con las siguientes tiras de 4X18cm (5); las cosemos (6) y acabamos con las tiras más largas: 4X25cm (7); una vez cosidas (8) ya tenemos el primer bloque acabado (9). (BLOQUE 1)
Podemos quedarnos con este bloque que es muy bonito y hacer trabajos esplendidos, pero, y ahora viene la parte de la magia, podemos transformarlo y convertirlo en un bloque con una cruz central.
Una vez planchado, lo cortamos en 4 partes haciendo una cruz (10). Las separamos (11) y las distribuimos como veis en el esquema (12). Fijaros en que ha de formarse una cruz del mismo color en el centro. Cosemos primero de dos en dos (13) y acabamos cosiendo los dos grupos (14). Ya tenemos el BLOQUE 2.
Podéis combinar los dos bloques o solo trabajar con un tipo cada vez. Da lo mismo como lo hagáis ya que el resultado será genial.


¡¡¡DE UNO A DOS CON UN PAR DE CORTES!!!


PATCHWORK TUTORIAL: TWO BLOCKS AND A BIT OF MAGIC.

The tutorial today is much easier and faster than the previous one and we can have two different blocks
You have the sizes and quantities on the schema. As you can see we work with strips 4 cm wide though the length varies. Only use a 12X12cm square that serves as a centrepiece and foundation of our initial block.
We started with the square and the first two strips of 4X12cm (1). We put them so there is one on the opposite side of the other and sew them (2). On the two sides that remain without framing we put two strips of 4X18cm (3). They must embrace the square and the two previous strips, why are 6 cm long. If you want to have more security, you can make the strips a little longer and once stitched (4) trim what above. We continue performing the same operation with the following strips of 4X18cm (5); sew them (6) and ended up with the longer strips: (7) 4X25cm; Once sewn (8) already have the first finished block (9). (BLOCK 1)
We can keep this block which is very nice and make splendid works, but, and now comes the magic part, we can transform it and turn it into a block with a central cross.
Once pressed, cut it into 4 parts making a cross (10). Separate them (11) and distribute them as you can see in the diagram (12). Look at that it must form a cross of the same colour in the centre. We first sew two (13) and just sewing the two groups (14). We have the BLOCK 2.
You can combine the two blocks or just work with only a type. It gives the same as you do that the result will be great.


ONE TO TWO WITH A COUPLE OF HACKS!!!

GOOGLE +: COMUNITAT “CRAFTY BLOGGERS”.

La setmana passada us vàrem parlar sobre el grup de Pinterest i aquesta volem explicar-vos com formar part de la comunitat de Google+.
Se’ns va passar pel cap que podríem crear una comunitat de bloguers per compartir els posts i, així, difondre la feina de tots els membres de la comunitat per incrementar les visites de tots els blogs. El lema és: Jo dono a conèixer el teu blog, tu dónes a conèixer el meu.
I ara les instruccions per poder formar-ne part.
El primer que heu de fer, evidentment, és crear-vos un perfil a Google+. És molt senzill i només heu de seguir les passes que us indiquen. Amb aquest perfil podeu seguir a qualsevol persona que tingui perfil a Google+ o convidar a vostres contactes gmail a ser els vostres seguidors. També podeu sol·licitar formar part de les diverses comunitats que hi ha a Google+ i ser convidats a formar part d’alguna d’elles.
Quan vam formar la comunitat vàrem convidar a molts bloguers a unir-se. Bé, a tots els que vam poder trobar. Per sort alguns que no vàrem saber localitzar, quan van saber de la nova comunitat, van sol·licitar formar-ne part i de seguida van ser acceptats. Deixem a la vostra discreció acceptar o no, si heu rebut la invitació.
A diferència de Pinterest, ens estimem més que els membres tinguin un blog i publiquin. També Facebook o un canal de YouTube on pengin vídeos de temàtica Crafty o DIY.
Si voleu, podeu penjar un banner al vostre blog; aquí us deixem les instruccions.
Us animem a compartir amb tots el vostre blog.

<div align="center">
<a href="https://plus.google.com/u/0/communities/100271001455651978729"
 title="Community"><img 
 src="http://i57.tinypic.com/e6wxly.jpg" border="0" alt="Image and video hosting by TinyPic" /></a></div>


QUANTS MÉS SIGUEM, MÉS VISITES TINDREM!!!

GOOGLE +: COMUNIDAD “CRAFTY BLOGGERS”.

La semana pasada os hablamos sobre el grupo de Pinterest y esta queremos explicaros como formar parte de la comunidad de Google+.
Se nos ocurrió que podríamos crear una comunidad de bloguer@s para compartir los posts y, así, difundir el trabajo de todos los miembros de la comunidad para incrementar las visitas de todos los blogs. El lema es: Yo doy a conocer tu blog, tú das a conocer el mío.
Y ahora las instrucciones para poder formar parte.
Lo primero que tenéis que hacer, evidentemente, es crearos un perfil Google+. Es muy sencillo y solo tenéis que seguir los pasos que os indican. Con este perfil podéis seguir a cualquier persona que tenga perfil  Google+ o invitar a vuestros contactos gmail a ser vuestros seguidores. También podéis solicitar formar parte de las diversas comunidades que hay en Google+ y ser invitados a formar parte de alguna de ellas.
Cuando formamos la comunidad invitamos a much@s bloguer@s a unirse. Bien, a tod@s l@s que pudimos encontrar. Por suerte algun@s que no supimos localizar, cuando supieron de la nueva comunidad, solicitaron formar parte y enseguida fueron aceptad@s. Dejamos a vuestra discreción aceptar o no, si habéis recibido la invitación.
A diferencia de Pinterest, preferimos que l@s miembros tengan un blog y publiquen. También Facebook o un canal de YouTube donde cuelguen vídeos de temática Crafty o DIY.
Si queréis, podéis poner un banner en vuestro blog; aquí os dejamos las instrucciones.
Os animamos a compartir con tod@s vuestro blog.


¡¡¡CUANT@S MÁS SEAMOS, MÁS VISITAS TENDREMOS!!!


GOOGLE +: COMMUNITY "CRAFTY BLOGGERS".

Last week we had talked about the group of Pinterest and that we want to tell you how to form part of the community of Google +.
It occurred to us that we could create a community of bloggers to share the posts and, thus, to disseminate the work of all members of the community to increase visits from all the blogs. The motto is: I give to know your blog, you give to know mine.
And now the instructions to be able to take part.
The first thing you have to do, obviously, is to create a profile Google +. It is very simple and you only have to follow the steps that they indicated. With this profile you can follow anyone who has profile Google + or invite your Gmail contacts to be your followers. You can also request form part of various communities that exist in Google + and be invited to be part of any of them.
When we formed the community we invite many bloggers to join us. Well, all we could find. Luckily a few that don't we know find, when they know of the new community, they apply to become part of it and were accepted. We leave to your discretion to accept or not, if you received the invitation.
Unlike Pinterest, we prefer that the members have a blog and publish. Also, Facebook or YouTube channel where hang Crafty or DIY-themed videos. 
If you want, you can put a banner on your blog; here you have the instructions.
We encourage you to share your blog with everyone.

<div align="center">
<a href="https://plus.google.com/u/0/communities/100271001455651978729"
 title="Community"><img 
src="http://i61.tinypic.com/2chxmpl.jpg" border="0" alt="Image and video hosting by TinyPic" /></a></div>

THE MORE WE ARE, THE MORE VIEWS WE HAVE IT!!!